The Assistant App is installed on Client PCs and can provide Nimbus task context via popup window. Based on configured Service Call Templates and Direct Call Templates different actions can also be executed simultaneously, e.g. opening context in the user's browser or triggering a web-request. All features are covered on the Assistant main page.
Preconditions
Supported Operating Systems: Currently this App is officially supported for Windows 7, 10, and 11.
INC Assistant App URLs
✅App Download: Luware provides Assistant Installer files on request. To get the latest version, visit the sites below.
✅Installation: Head to Assistant Installation for further details. For a first-time setup and walkthrough, visit Use Case - Setting Up Assistant.
| English | https://luware.com/whitepaper-guides/luware-nimbus-assistant |
|---|---|
| German | https://luware.com/de/whitepaper-guides/luware-nimbus-assistant |
Preconditions .NET 8.0.x
PRECONDITIONS (.NET 8.0.x)
⏫Upgrading from an older Version?
If you are currently running a .NET 6 Nimbus Assistant and you want to upgrade to .NET 8 then you should follow these steps:
- Install the latest setups mentioned in the preconditions below (.NET 8 )
- Quit/Terminate the current running NA instance and ensure the process is stopped
- Install the NA Setup (.NET 8)
In the Nimbus Admin UI |
On each client machine where Assistant is installed |
|---|---|
|
Before you run Assistant setup, the following prerequisites need to be installed on each client machine:
.NET - Install latest 8.0.x.version of each:
→ Download: https://dotnet.microsoft.com/en-us/download/dotnet/8.0 WebView2 - Install latest version from: → Download: https://developer.microsoft.com/en-us/microsoft-edge/webview2/#download-section. |
✅ Related Steps:
- Before the installed Assistant App can be used productively, extra configuration steps are required to be done by your Tenant Administrator. → See Use Case - Setting Up Assistant.
Preconditions .NET 6.0.x
Assistant Upgrade Notice: Phase-out of .NET 6.0 in favor of .NET 8.0
Older Versions of Assistant running with a .NET 6 dependency. An upgrade want to upgrade to .NET 8 is highly recommended.
→ See Tab: Preconditions .NET 8.0.x for details
PRECONDITIONS (.NET 6.0.x)
The Assistant application needs to be configured by your Tenant Administrator first before the application can be used by Agents.
In the Nimbus Admin UI |
On each client machine where Assistant is installed |
|---|---|
|
Before you run Assistant setup, the following prerequisites need to be installed on each client machine:
.NET - Install latest 6.0.x.version of each:
→ Download: https://dotnet.microsoft.com/en-us/download/dotnet/6.0 WebView2 - Install latest version from: → Download: https://developer.microsoft.com/en-us/microsoft-edge/webview2/#download-section. |
Installation Steps
There are two options to install Assistant:
- Option A: Manual setup
- Option B: Silent rollout via Installer Package
Option A: Manual setup of Assistant
☝ These setups are meant to be run on the client machines of your Nimbus users (Agents):
-
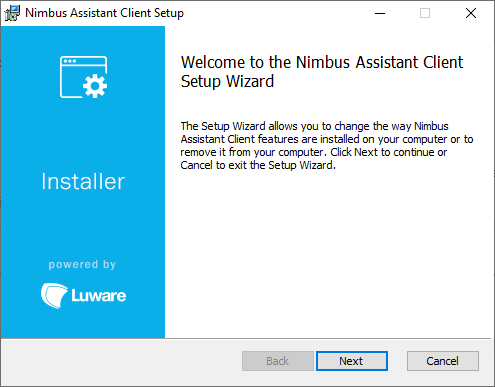
Run the downloaded MSI and click through the setup
- Configure the following options:
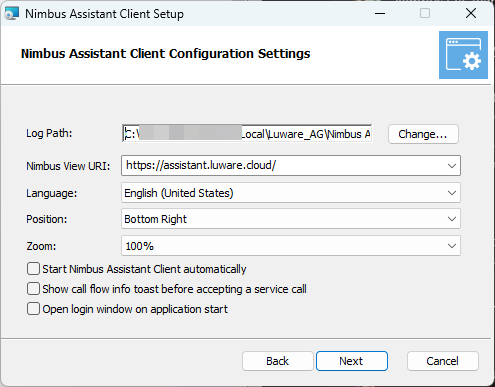
- Select the preferred options (🔎Parameters are explained in the “Installation parameters” table in Option B)
- Choose a folder for logging
- Provide the correct view URI depending on your cluster location:
INC Nimbus Assistant View URLs
| Switzerland 01 | https://assistant.ch-01.luware.cloud/ |
|---|---|
| Switzerland 02 | https://assistant.ch-02.luware.cloud/ |
| Germany 01 | https://assistant.dewe-01.luware.cloud/ |
| Germany 02 | https://assistant.dewe-02.luware.cloud/ |
| United Kingdom 01 | https://assistant.ukso-01.luware.cloud/ |
| Australia 01 | https://assistant.aue-01.luware.cloud/ |
| West Europe 01 | https://assistant.euwe-01.luware.cloud/ |
| East United States 01 | https://assistant.use-01.luware.cloud/ |
✅ Make sure to configure your web proxies to allow access to these domains or whitelist the complete *.luware.cloud domain.
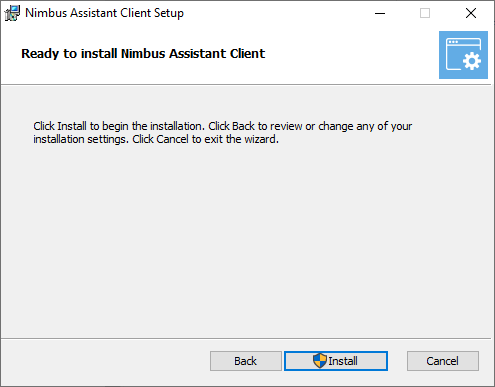
- Proceed until ready to install the client.
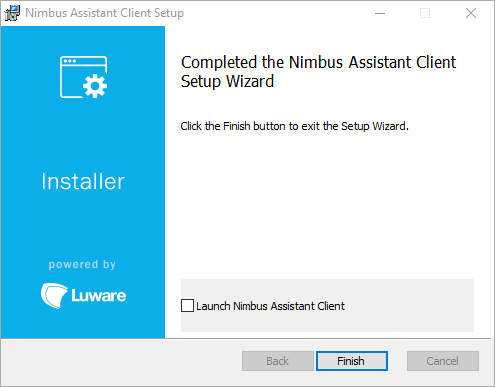
- When you finish, launch the application
-
Log in with your O365 account acting as Nimbus/Teams call handling user.
🔍 More details can be found on the Assistant page of our Knowledge Base, focusing on daily use.
Option B: Installer packaging and rollout
☝ Follow this method for rollouts in larger IT environments:
1. Make sure all the ✅preconditions above on this page are fulfilled on the target machines (fitting .NET version installed).
2. To perform a silent installation of the Assistant client, the following example PowerShell command can be used:
NOTE: POWERSHELL SCRIPT BROKEN OVER FOR BETTER READABILITY

msiexec /i "Nimbus.Assistant.Client.msi" /l "install.txt" /quiet LOGGING_PATH=`"C:\Nimbus Assistant Logs\`" NIMBUS_VIEW_URI=`"https://assistant.us-01.stage.nimbdev.com/`" AUTORUN=true LANGUAGE=en SHOW_TOAST_ON_SERVICE_ACCEPTING_CALL=true OPEN_LOGIN_WINDOW_ON_STARTUP=true POSITION=BottomRight PRECALLINFO=Info
PowerShell tip - Escaping double quotes: Use a backtick ` before every double quote that appears within parameter values. This tells PowerShell to treat the quotes as literal, allowing the command to pass the arguments correctly.
3. ✅ Adjust the msiexec command parameters as needed.
🔍 Also see: https://learn.microsoft.com/en-us/windows-server/administration/windows-commands/msiexec
| MSIEXEC Switches | Description | Default Value | Possible Values | ||||||||||||||||
|---|---|---|---|---|---|---|---|---|---|---|---|---|---|---|---|---|---|---|---|
| LANGUAGE | Language | en | en, de, nl, it, fr, es, da | ||||||||||||||||
| POSITION | Position | BottomRight | BottomRight, TopRight | ||||||||||||||||
| AUTORUN | Starting of NA automatically | true | true, false | ||||||||||||||||
| SHOW_TOAST_ON_SERVICE_ACCEPTING_CALL | Showing of Call Flow before accepting | false | false, true | ||||||||||||||||
| PRECALLINFO |
Note: when SHOW_TOAST_ON_SERVICE_ACCEPTING_CALL=true, Assistant will show tab CallFlow by default | n/a | CallFlow, Info | ||||||||||||||||
| OPEN_LOGIN_WINDOW_ON_STARTUP | Opening of the login window on application start | true | true, false | ||||||||||||||||
| LOGGING_PATH | Path for the log folder | none | Any absolute or relative path. | ||||||||||||||||
| ZOOM | Zoom-level of the application (for readability) | 1 | 1, 1.25, 1.5 | ||||||||||||||||
| BRING_TO_FOREGROUND | If the app should come the to front upon Nimbus Events | true | true, false | ||||||||||||||||
| TOPMOST | If the app should be shown always as topmost window on the screen1 | false | false, true | ||||||||||||||||
| USE_AUDIO_FOR_EMAILS | Audio notifications for Email1 | false | false, true | ||||||||||||||||
| USE_AUDIO_FOR_EXTERNAL_TASKS | Audio notifications for ET1 | false | false, true | ||||||||||||||||
| USE_AUDIO_FOR_INSTANT_MESSAGES | Audio notifications for IM1 | false | false, true | ||||||||||||||||
| AUDIO_FOR_EMAILS | Sound for Email notifications1 | n/a | alarm1, alarm2, bell1, bell2, gong1, siren1 | ||||||||||||||||
| AUDIO_FOR_EXTERNAL_TASKS | Sound for ET notifications1 | n/a | alarm1, alarm2, bell1, bell2, gong1, siren1 | ||||||||||||||||
| AUDIO_FOR_INSTANT_MESSAGES | Sound for IM notifications | n/a | alarm1, alarm2, bell1, bell2, gong1, siren1 | ||||||||||||||||
| NIMBUS_VIEW_URI | URL for the webview | 🔍 Adjust the NIMBUS_VIEW_URIs according to your Nimbus cluster: INC Nimbus Assistant View URLs
✅ Make sure to configure your web proxies to allow access to these domains or whitelist the complete *.luware.cloud domain. |
|||||||||||||||||
1 available since V1.90.
Troubleshooting
If you have problems installing Assistant installation, read the following.
.NET errors
.NET not found
🔎Analysis: Check whether the "dotnet" command can find the required .NET versions.
✅Workaround:
- Install the x64 installer version of .NET. When you install the x86 (32-Bit) version on Windows 11, it may not register the paths at all, and Nimbus Assistant setup will quit with error “.NET not found.".
- If installing the x64 version for .NET still does not register the path correctly, then you need to adjust your system environment settings to make sure that the
dotnetcommand will look for the 64-bit apps first instead. → See below.
Check available .NET runtimes
The dotnet command will go through the list of configured system paths from top to bottom.
Open a command prompt (Win+R) and run the following command:
dotnet --list-runtimes⮑ This should list all the available .NET runtimes and their versions, e.g. like so: 
🤔Why do this? The Nimbus Assistant installer is specifically looking for the AspNetCore, NETCore and WindowsDesktop entries for version 6.0.x. or 8.0.x. In the screenshot above, these are installed in the regular "C:\Program Files\" folder, which is where Windows will place application binaries for 64-bit apps. That's what we're looking for. You may see the right versions here, but their folders may show up as C:\Program Files (x86)\ - these contain 32-bit apps and can't be used by Nimbus.
Manual Path Check / Edit
This method should only be attempted when all x64 .NET installer variations do not work as intended. In this case you can check which paths have been registered by running this command in PowerShell:
$Env:Path.Split(';')For example, this may look like this:
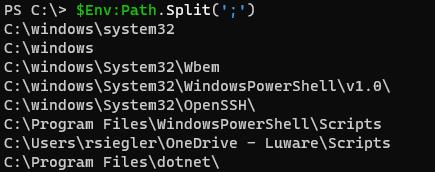
🔎Analysis: If the path "C:\Program Files (x86)\dotnet\" is listed here before the "C:\Program Files\dotnet\" path, this will cause the issue. It would be best to move this entry down the line to make sure that the 64-bit path gets searched first.
- Open Start Menu and search “System Variables”. Select “Edit System Variables” and confirm.
⮑ System Properties open up. - Within “Environment Variables”
- Locate “System Variables” > “Path” and “Edit…”
- Ensure that "
C:\Program Files (x86)\dotnet\" is listed here before the “C:\Program Files\dotnet\”. Otherwise “Move Up” the entries as needed.

Other installation issues
✅Try running the installer from a command prompt, by executing the following command:
msiexec /i "<Full Path to the Nimbus Assistant Client installer MSI file>" /l*v "<Path to a log file>"The last parameter ensures that log files get generated from the setup. Go through the installation until the error comes up and then review the contents of the generated log file to see where the installer is hanging. If you cannot troubleshoot it yourself, get in touch with support.
INC Luware Support Address
| Luware Website | https://luware.com/support/ |
|---|---|
| Luware Helpdesk | https://helpdesk.luware.cloud |
| Cloud Service Status | https://status.luware.com/ |