In this use case, we want to look up information about a caller in Microsoft Dynamics and show it in Nimbus. When a call is accepted by an agent, we want Nimbus to open up the contact view of the caller in Microsoft Dynamics in a new tab.
PRECONDITIONS
In this use case we assume that you've already created a Nimbus service.
Enterprise Routing Your service needs to have a Enterprise Routing service license assigned to be able to use the advanced Workflow Activities. See Nimbus Features for a full overview of all available features by license.
Additionally, ensure to read and follow the Nimbus Power Automate Connector preconditions, as this Use Case will make use of Nimbus Trigger Events and Flow Actions.
You will also need:
- A Power Automate Premium subscription for the "Microsoft Dataverse" connector element. The subscription is also required for the Nimbus Connector.
- A Microsoft Dynamics 365 instance. Alternatively you can follow the setup of a demo environment as described below.
INC Icon Legend Accordion
Show Icon Legend
| 💡 = A hint to signal learnings, improvements or useful information in context. | 🔍 = Info points out essential notes or related page in context. |
| ☝ = Notifies you about fallacies and tricky parts that help avoid problems. | 🤔 = Asks and answers common questions and troubleshooting points. |
| ❌ = Warns you of actions with irreversible / data-destructive consequence. | ✅ = Intructs you to perform a certain (prerequired) action to complete a related step. |
Show a preview of the flow

Setting Up your Microsoft Dynamics 365 Demo Environment
✅ If you need to create a Microsoft Dynamics 365 Demo environment for testing purposes, please follow these steps.
- Start a Free Trial for Microsoft Dynamics 365| Microsoft Dynamics 365 This creates a demo environment with dummy data.
- Note down your personal the Dynamics URL. It should look like https://orgxxxxxxx.crm4.dynamics.com.
- Open a suite to work with. We have chosen "Sales Hub" for this demo.
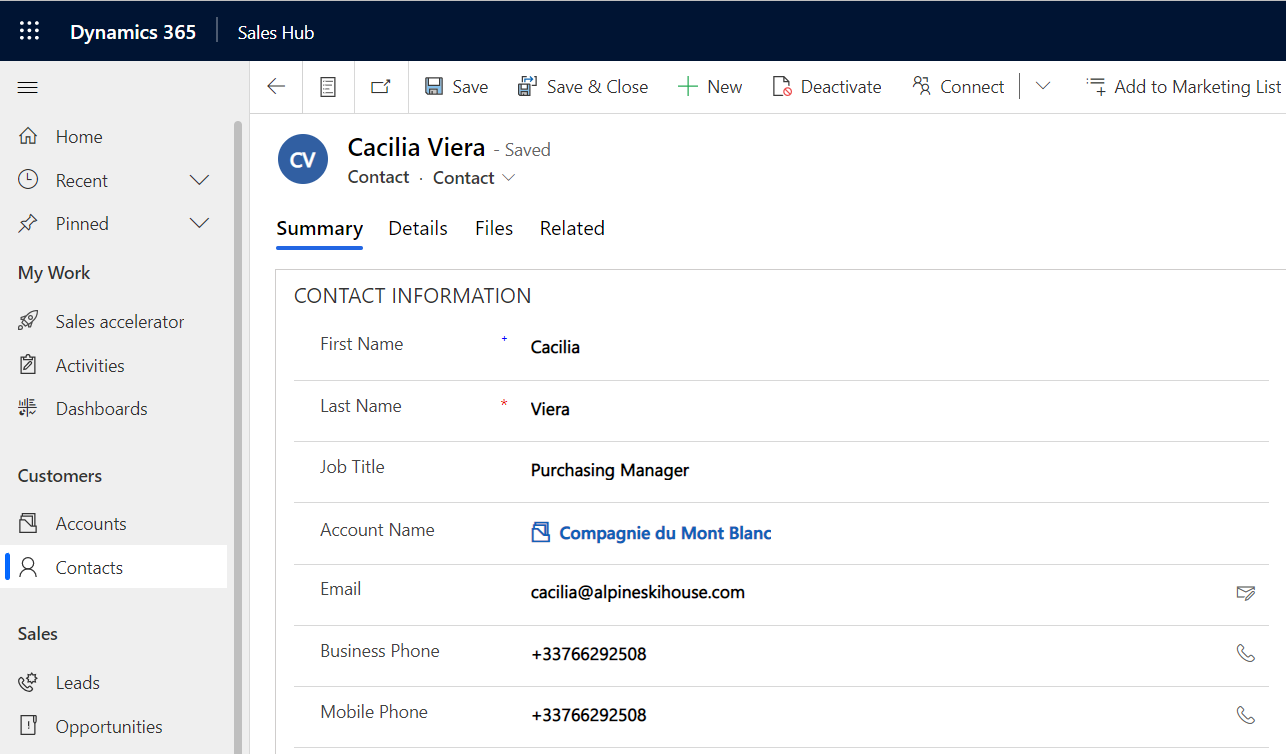
- Pick a contact and edit the phone number.
💡 For later test purposes, edit the phone number (here Cacilia Viera > Business Phone) to match the cell phone as shown in the example below.

Preparation in Nimbus
✅ We need to create some variables in Nimbus first.
- In Nimbus, we need to go to Configuration > Parameters and create a Custom Parameter to store the Contact ID of the Microsoft Dynamics contact:

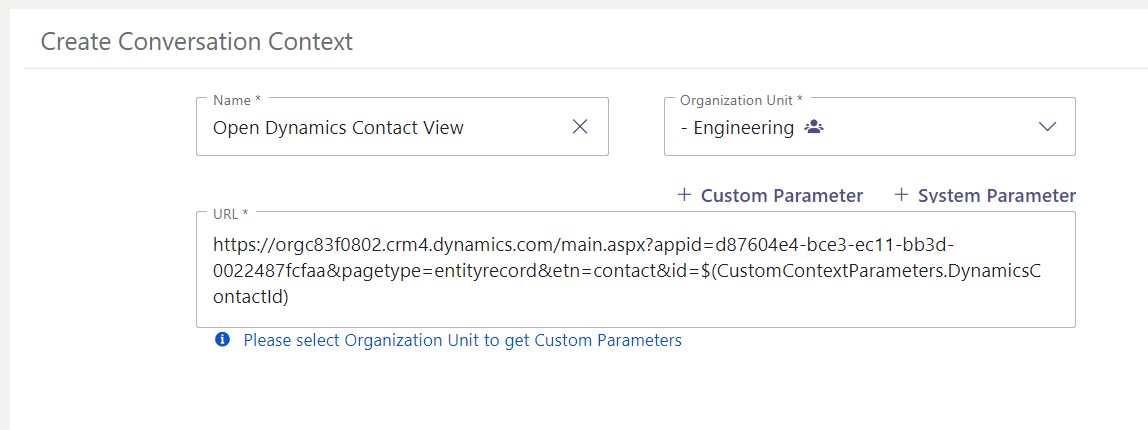
- Still within Nimbus Configuration, go to Conversation Context and create a Context item with the URL to Microsoft Dynamics.
- Set the URL using the Custom Parameter we just created: "DynamicsContactId" that will hold the contact ID. This will eventually form your final URL to your Dynamics instance.
- In this example: https://orgcxxxx.crm4.dynamics.com/main.aspx?appid=d87604e4-bce3-ec11-bb3d-0022487fcfaa&pagetype=entityrecord&etn=contact&id=$(CustomContextParameters.DynamicsContactId)

- Make this Conversation Context available in your Nimbus via Services Overview > Service Settings > "Extensions" Tab.

Create Your Flow
✅ Preconditions:
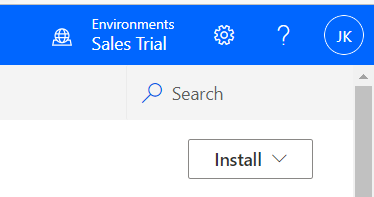
- In Power Automate, ensure you work in the correct environment. You can select it accordingly next to your Account information.
Where to switch the environment in Power Automate |
Where to find the environment name in Microsoft Dynamics 365 |
|---|---|
 |
 |
💡 This is necessary to be able to work with the right tables when using the Microsoft Dataverse Connector.
Now it's time to create a new flow:
- Head to "My Flows"
- Click on "+ New Flow" and create a blank "Automated Cloud Flow"
- Give your new flow a speaking name, e.g. "Dynamics Caller Lookup"
- In the text box underneath, search for “Nimbus” and choose the "When a task changes state" trigger
- Click the "Create" button

- Select the “When a task changes state” Trigger Event.
- In the “Services Item” dropdown select the Nimbus service's UPN.
💡 You can also get the data of multiple services at this point, but for the sake of simplicity we keep it to one service in this example. - In the “Task Events” dropdown select “System Accepted”.
- In the “Advanced parameters” dropdown enable “Modalities” and "Directions".
- In the “Modalities Item” dropdown select “Audio”.
- In the “Directions Item” dropdown select “Inbound”.
Get Microsoft Dynamics Contacts
✅ We want to search for the caller in the Microsoft Dynamics contacts.
- In the editing area click
 to add a new action.
 - Search for "dataverse list rows" and select “List rows” under the “Microsoft Dataverse” section.
- Configure the action as follows:
| Field | Value to fill in / 🌟 = Nimbus dynamic content | |
|---|---|---|
| Table Name | 🌟 ID of last connected user |  |
| Filter Rows | mobilephone eq '@{triggerOutputs()?['body/microsoftCallerId']}' (in our example we want to filter on the MobilePhone column in Dynamics. In Nimbus the phone number parameter is stored under “Microsoft Caller ID”) | |
| Row Count | 1 (as we we only want to get the first results) | |
Update the Nimbus Task
We're assuming that your previous data retrieval step was successful. Now it's time to let Nimbus know about it so the caller info is also shown in the UI and the Dynamics Contact Id will be set in Nimbus using Flow Action “Update Task” .
- In the editing area click
 to add a new action.
 - Search for "Nimbus" and select “Update Task” under the “Luware Nimbus” section.
- Configure the action as follows:
| Field | Value to fill in / 🌟 = Nimbus dynamic content / 🌟🌟= List rows dynamic content | |
|---|---|---|
| Task ID | 🌟 Task ID |  |
| Customer First Name | 🌟🌟First Name | |
| Customer Last Name | 🌟🌟Last Name | |
| Customer Display Name | 🌟🌟Full Name | |
| Customer Company | 🌟🌟Company Name (value) | |
| Customer Job Title | 🌟🌟Job Title | |
| Customer Department | 🌟🌟Department | |
| Custom Context Parameters |
Click on |
|
 to and add